Created by Charles on 10/29/2023. Updated on 10/31/2023.
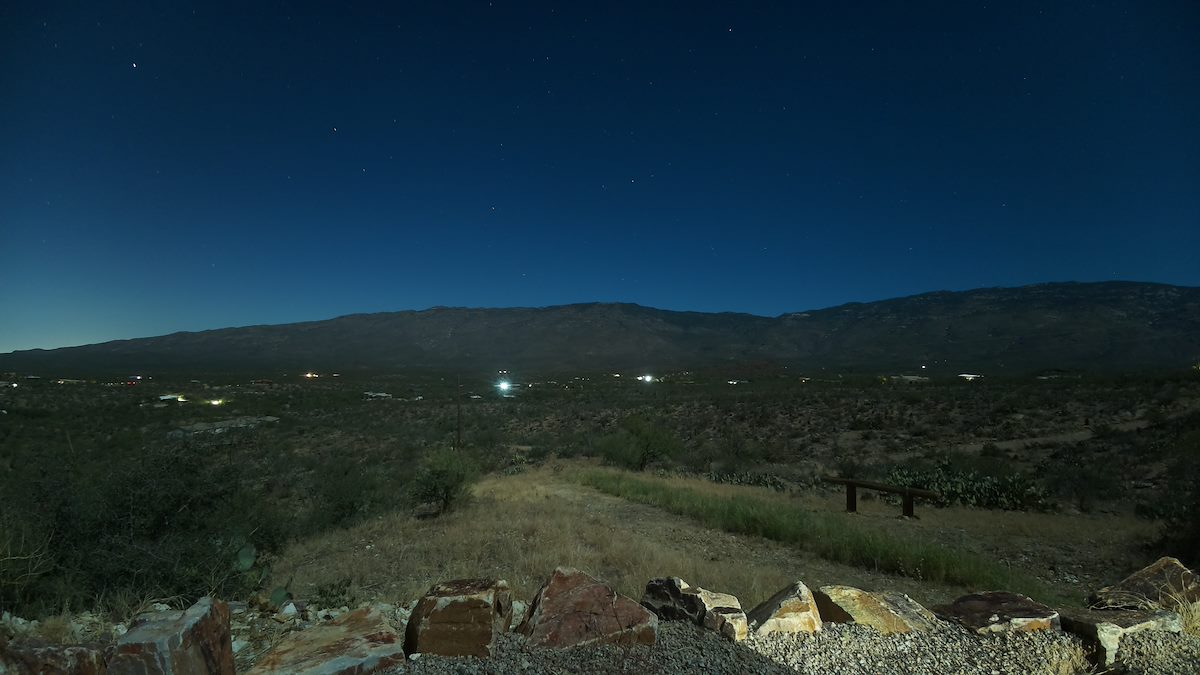
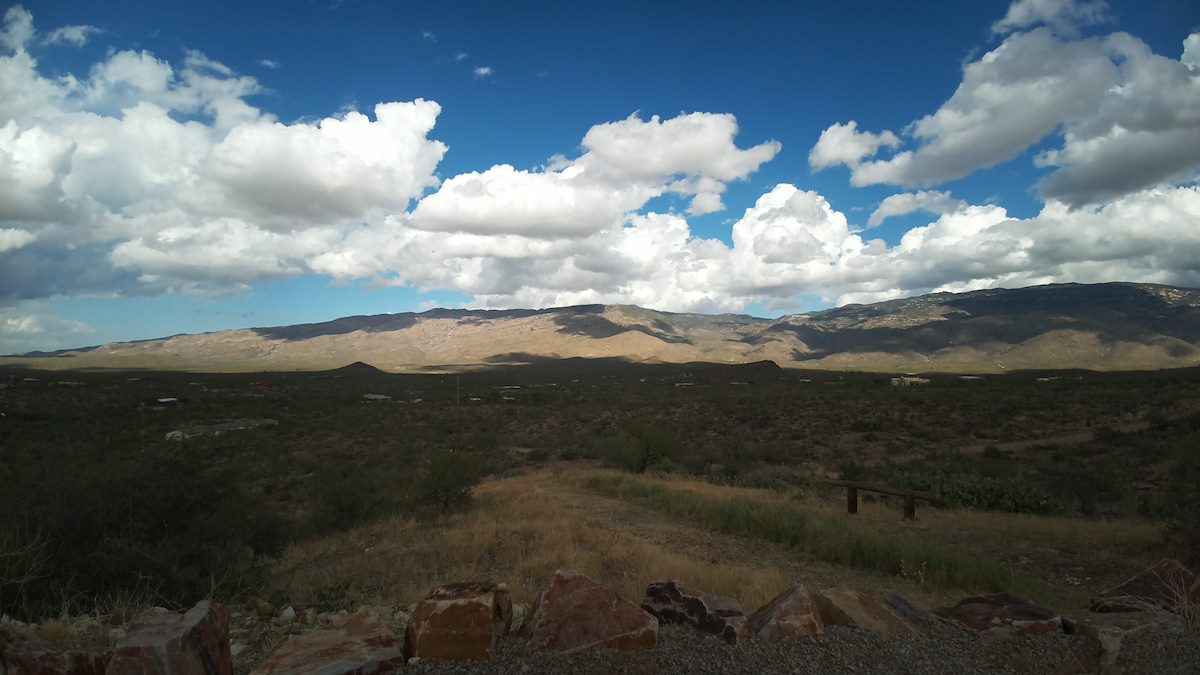
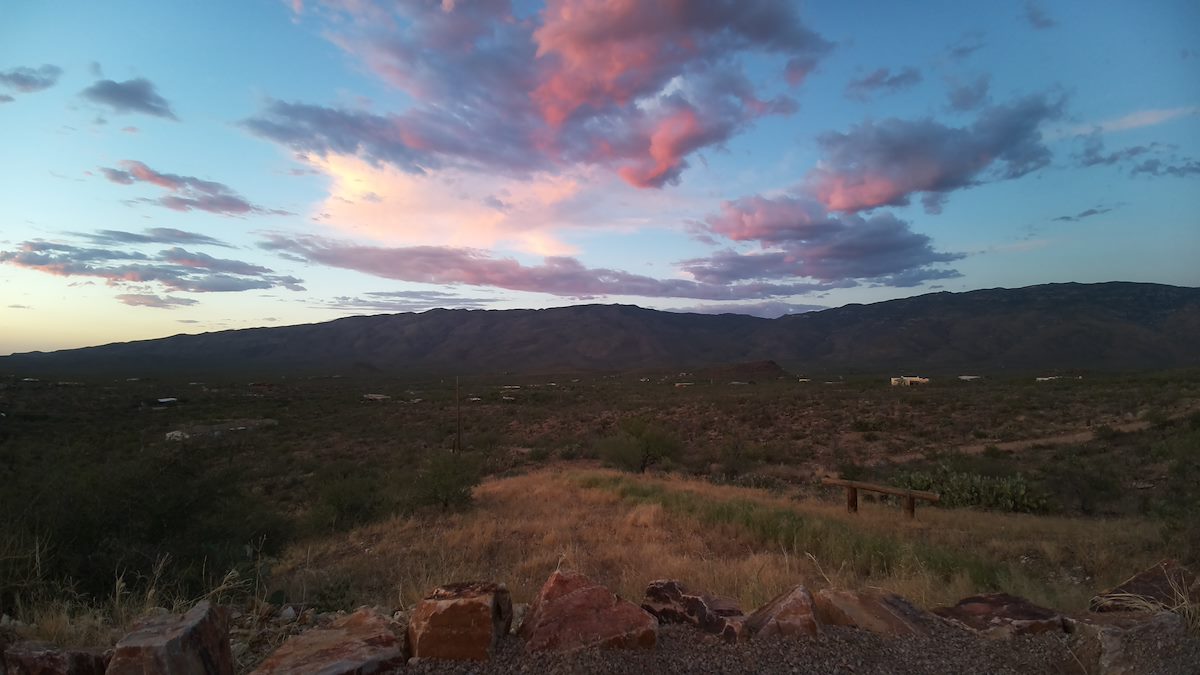
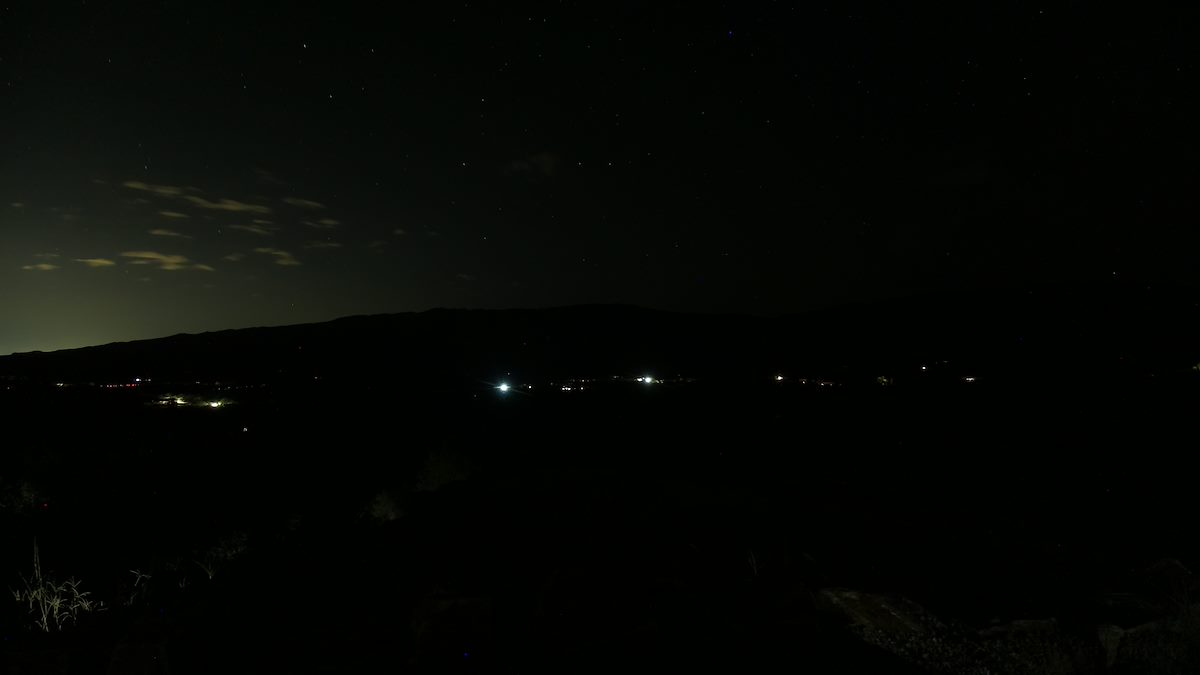
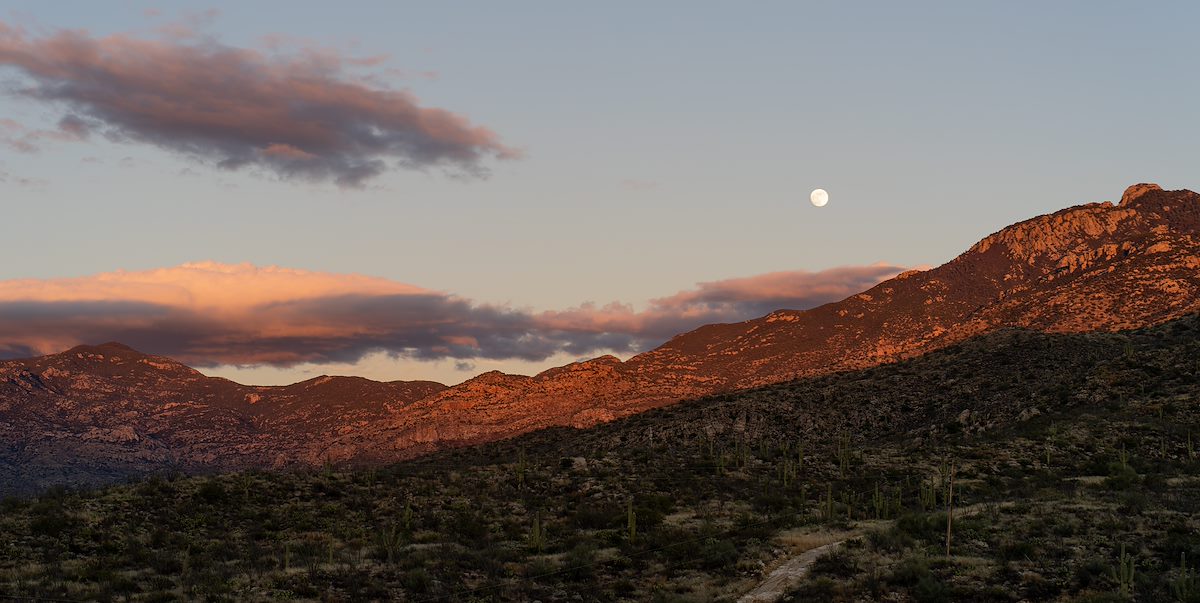
Moonlit Night - North. 10/28/2023.
For a number of years my wife and I used a now archived project and a Raspberry Pi 4 Model B to take photographs of and sensor readings from an area inside our house. The project worked nicely and was a good learning experience.
Once the project was defunct I found myself enjoying commercial sensor products more than using sensors on a Pi (SensorPush and Tempest Weather System for example), but the intersection of photography and programming the Pi offered remained very intriguing...
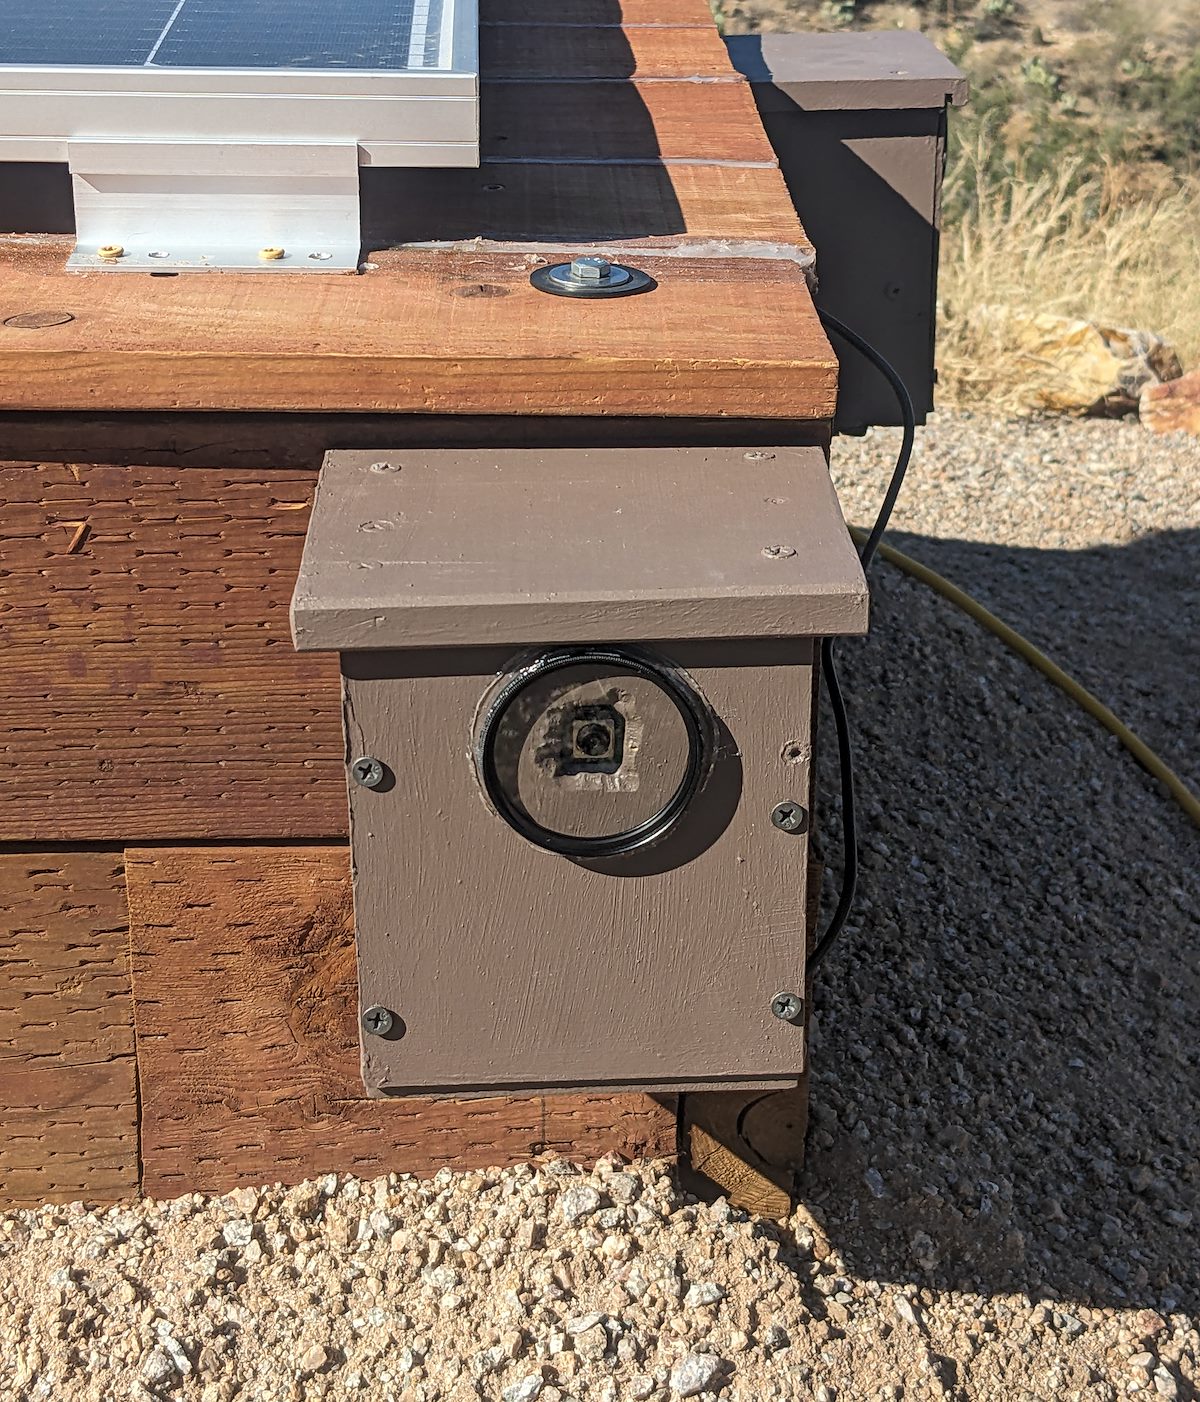
Largely Recycled Pi Camera Enclosure. 10/16/2023.
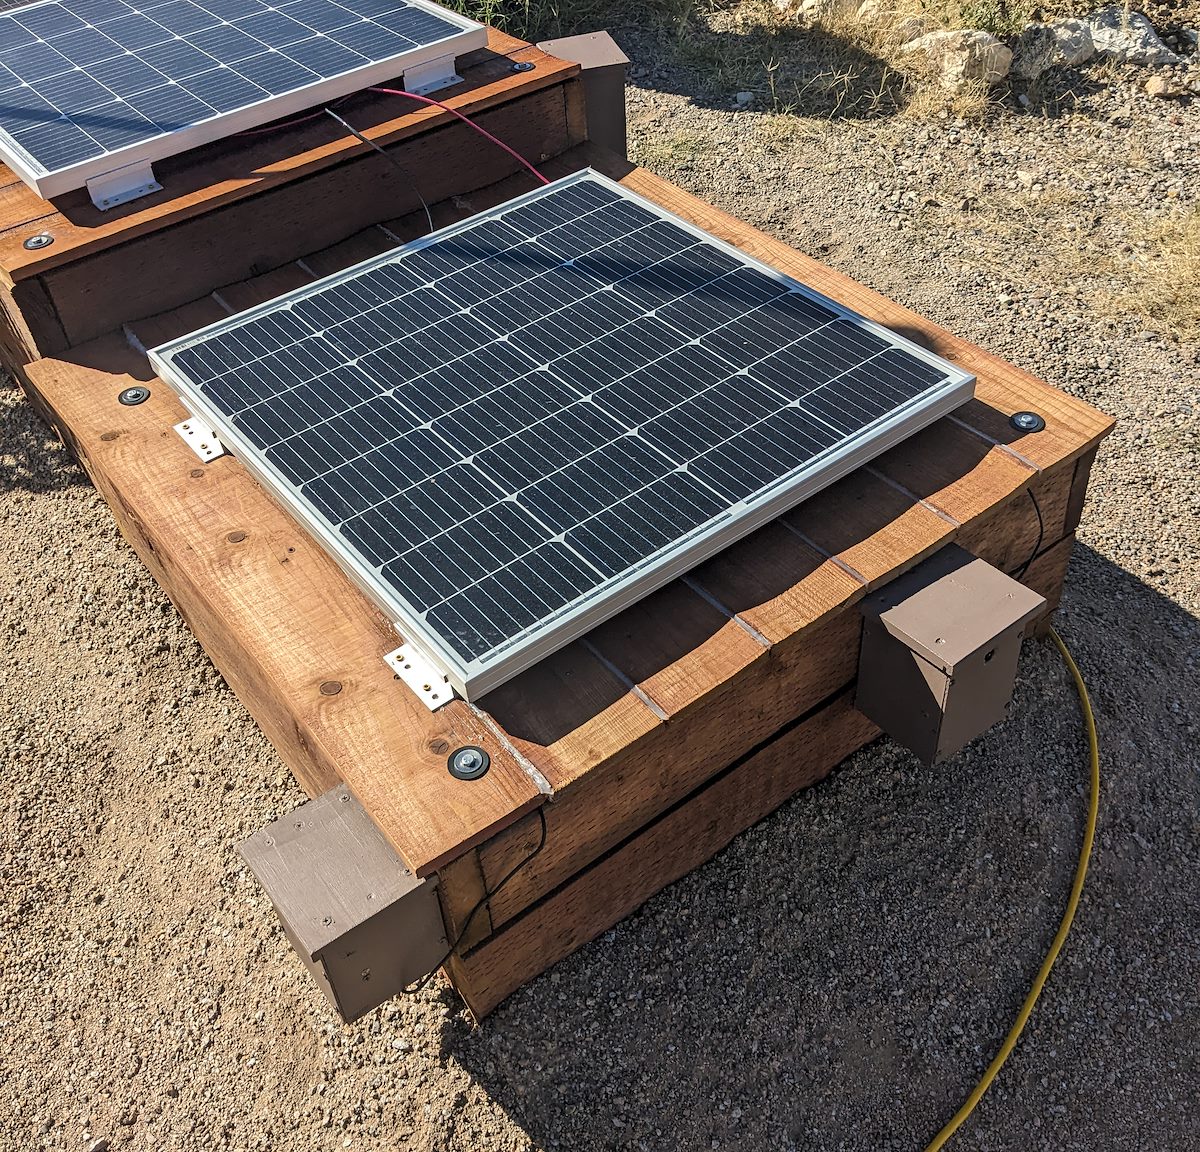
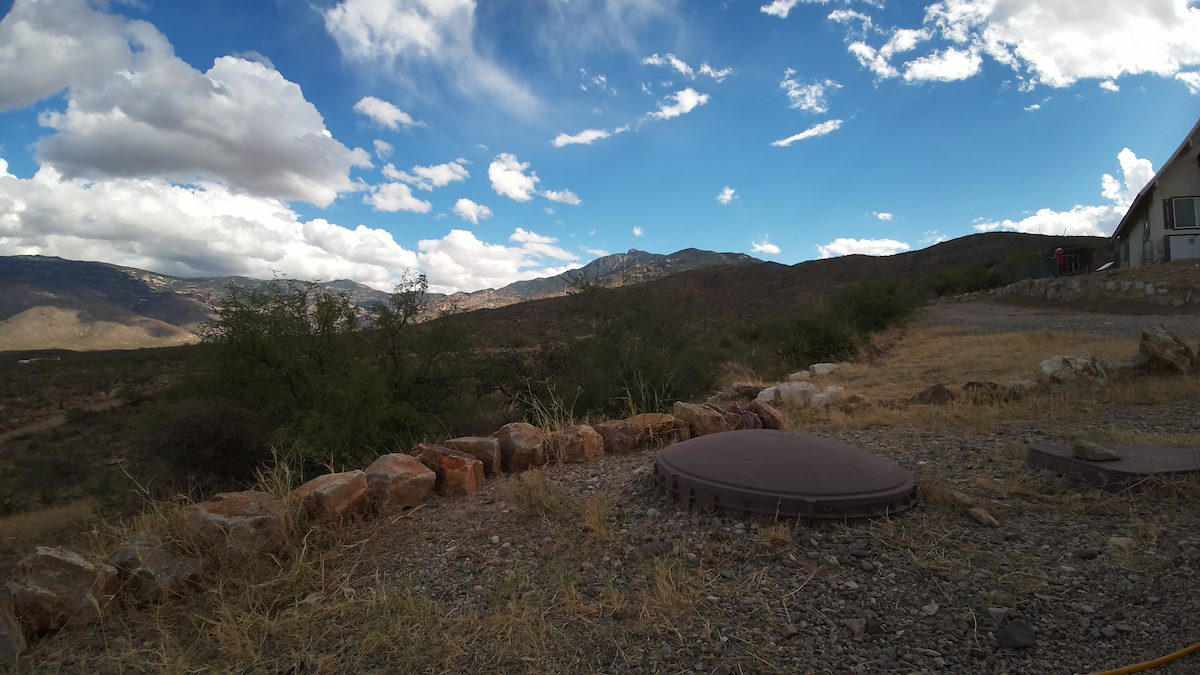
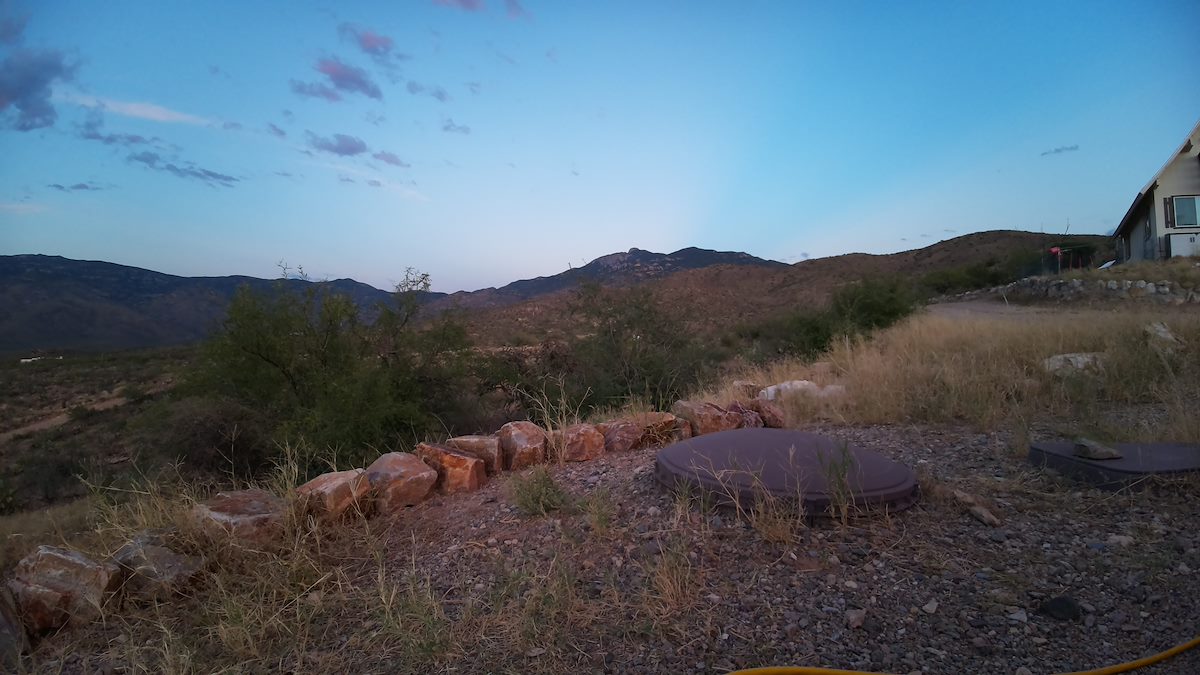
This year we built a 12V solar system at our home that has enough spare power to easily run a few Pis - and it happens to be in a spot with a decent view - so I got to work purchasing Pis with cameras, building weatherproof enclosures and writing software for a new photography project!
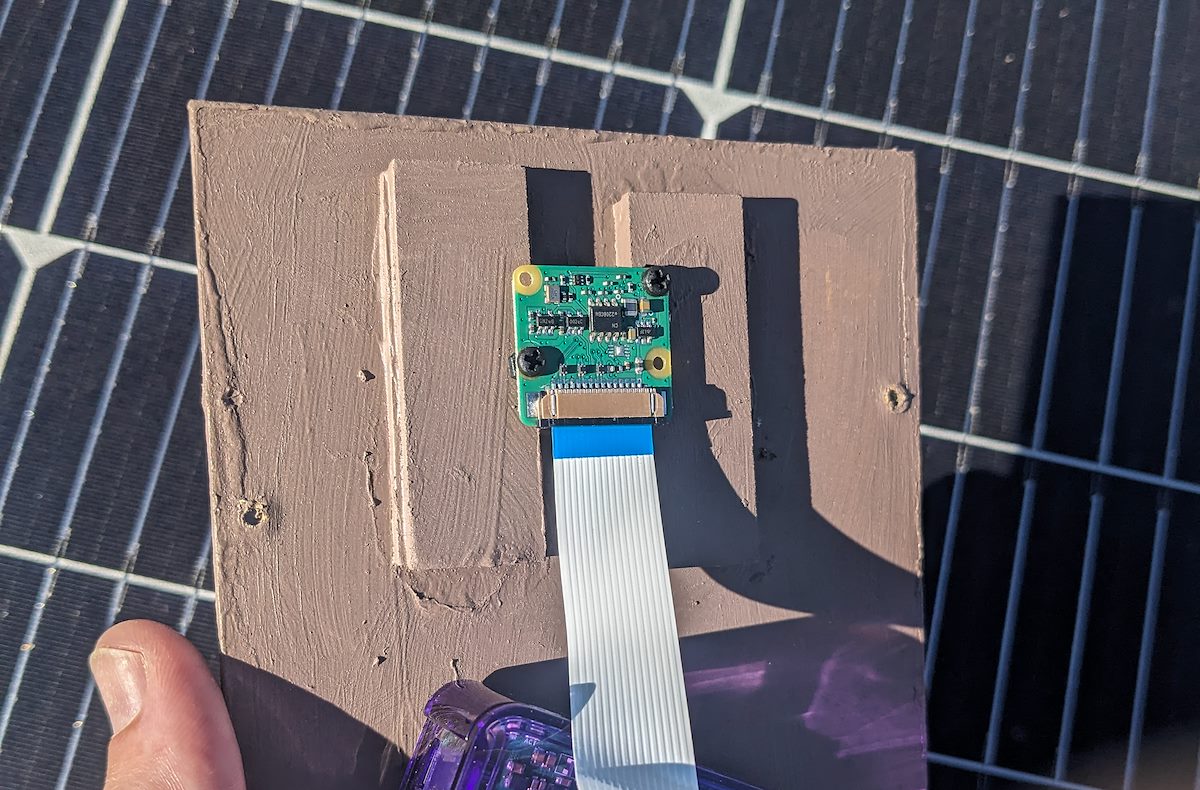
Camera Mounted to the Front of the Pi Enclosure. 10/12/2023.
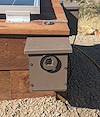
The Pis need to be outside for this project and so a weatherproof enclosure was a necessity. For the enclosures I used wood, glue, screws, nails, paint and screen that we already had around the house. My carpentry and painting was very basic - not really worth comment - but the process of getting the camera lens sealed was interesting and worth sharing:
The first enclosure I built used plexiglass for the entire front panel of the enclosure - but at least with the plexiglass I had the images were never sharp. I was using plexiglass left over from another (not camera oriented) project and I didn't want to dive into figuring out 'best optical quality plexiglass' (and didn't want glass for durability reasons) so I abandoned this approach.
To move to another strategy I mounted the camera on a solid front panel with a hole for the lens - on the first try the silver part of the camera module was tight to the front panel - but with the tight mounting I was back to out-of-focus photographs... In the end I added a spacer to mount the camera just off the front panel.
I tried a plexiglass dome off of Amazon to cover the exit hole for the camera - this was great for part of the photograph but distorted the edges. Clearly a dome over a camera can work but at least with this dome/setup it was going to require mounting the camera farther into the dome, not a complication I was interested in.
The solution that finally worked for me was using a UV lens filter and hot gluing it to the outside of the enclosure. I used $8 Tiffen 55mm UV Protector Filters - it is easy to find smaller diameter filters but after some experiments I found this size easy to position so that it isn't visible in the corners/edges of the photo.
The total cost of a Pi and enclosure was around $100 - you can easily find security cameras or game cameras at this price point which likely have some features that would be time consuming to replicate with a Pi, but for some projects the flexibility of having your camera connected to an open general purpose computer is hard to beat!
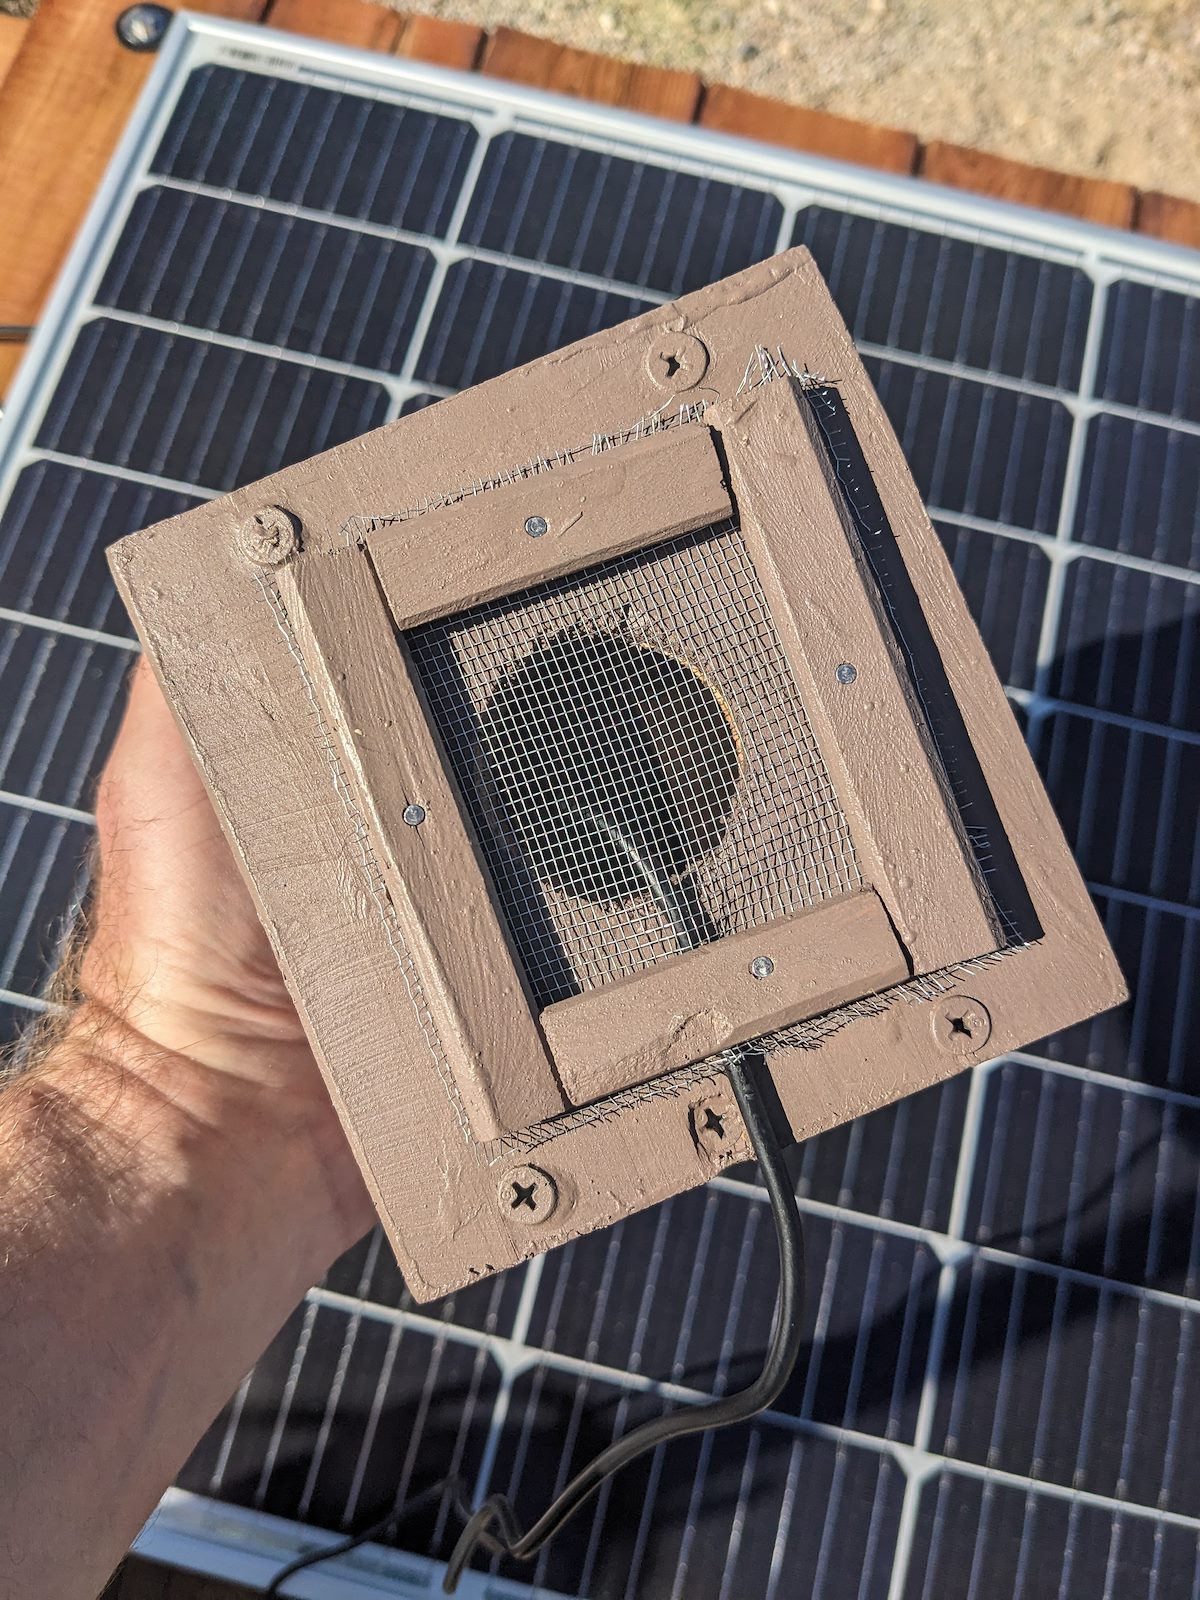
Bottom of the Pi Enclosure. 10/12/2023.Three Pi Enclosures Facing Roughly East, North and West. 10/12/2023.
Taking photographs with a Pi and the official camera modules is easy to script and there are some interesting pieces of software available like allsky - but for this project I decided to write my own software in C# to allow the scheduling that I wanted.
The program gets Sunrise/Sunset times from a file you place next to the program. This allows you to provide whatever sunrise/sunset times you want - in our case we generated the file with gvellut's tppss which allowed us to get sunrise/sunset times taking into account the local topography (we have a mountain peak to the east and care about when the sun comes over the ridge - not about the sunrise time on the imagined true horizon we can't see...).
Photos are taken at Sunrise, Sunset and at times defined in the configuration file including:
A number of photographs evenly distributed between Sunrise and Sunset (during the day - 0 is valid)
A number of photographs evenly distributed between Sunset and Sunrise (during the night - 0 is valid)
Times relative to sunrise and sunset - for example Sunrise+10 for a photograph 10 minutes after Sunrise
Clock Times
Error messages are delivered as image files into the same directory as the photographs - I rarely ssh into or monitor the Pis and only look at the photographs after a periodic task transfers them into a central directory - so this provides 'good enough' alerting without needing the Pis to have email/text/alert api access.
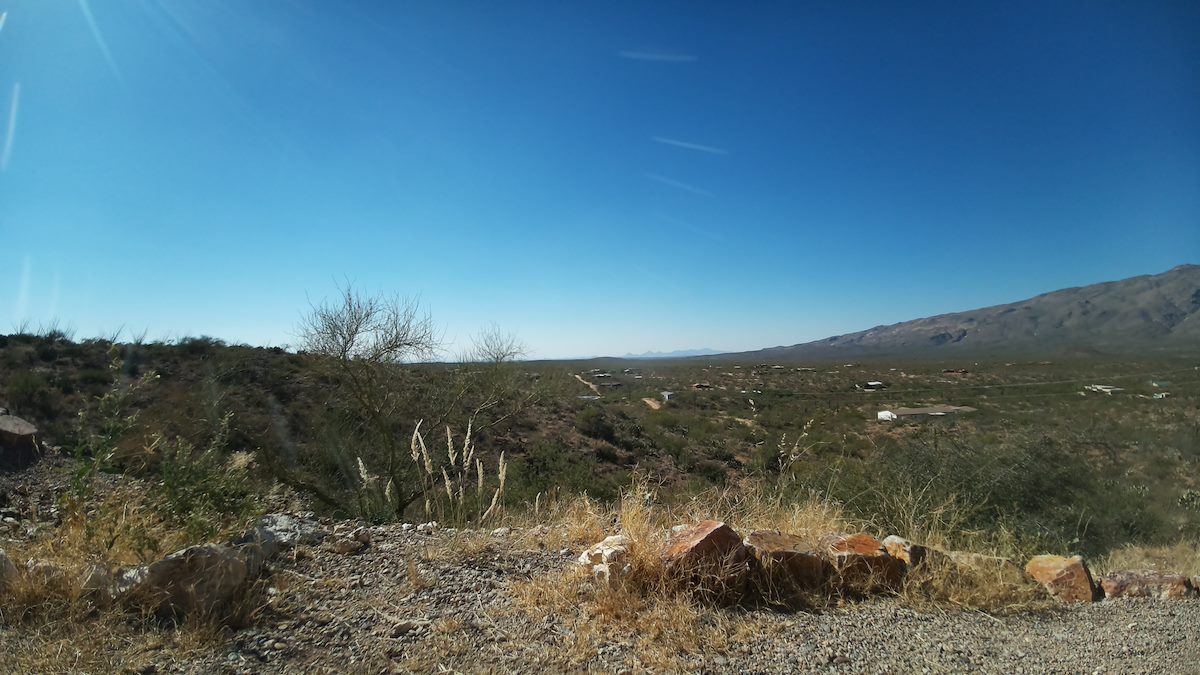
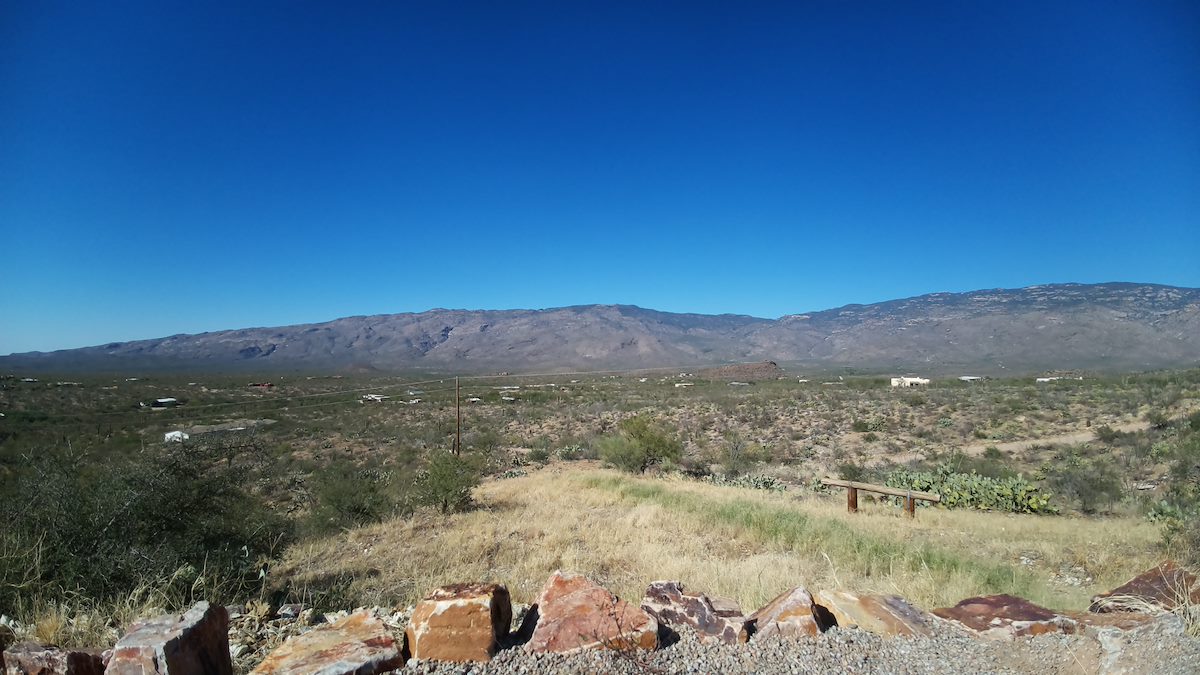
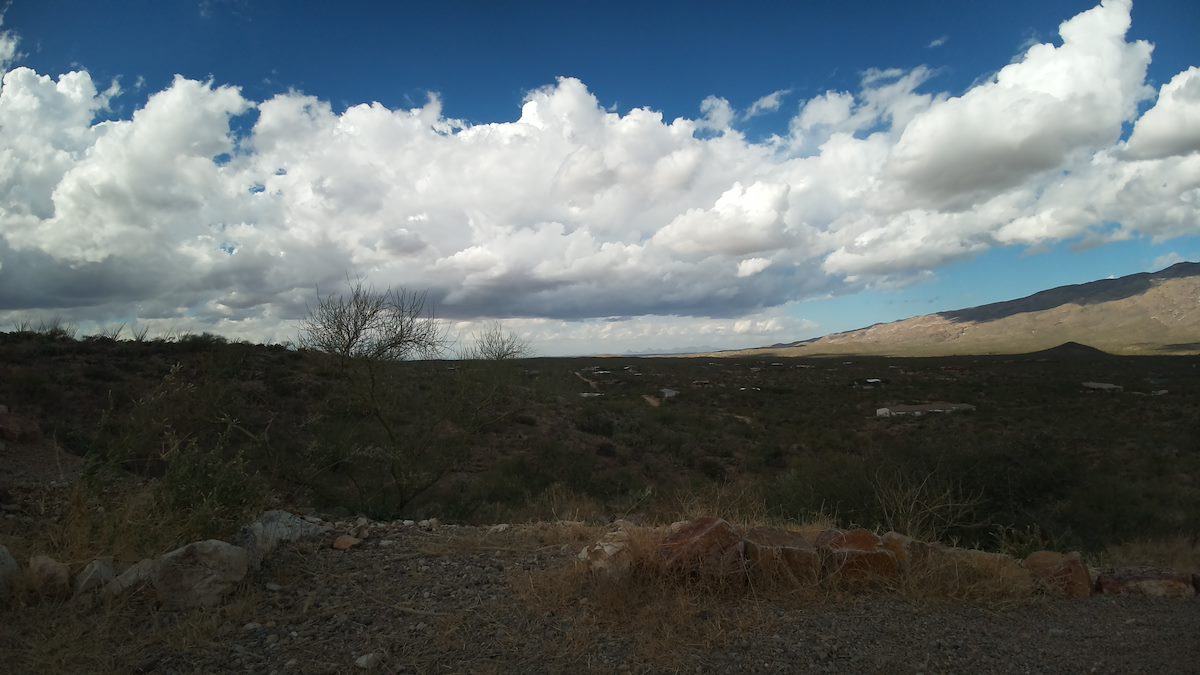
The wide angle camera and three overlapping photographs give an interesting-to-me picture of the landscape surrounding us - sometimes during the day the photographs are pure documentation, hard to love full-sun-clear-sky-views, sometimes they capture interesting weather or nice light and even over the short time we have had them running you can see the sun move and the moon change.
But the individual photographs are really not the point of this project - if I want a great picture I have frequent access to this location, own higher quality cameras and gear and have enough skill to take and process better photographs than I can create with the Pi Camera Module.
The point of this project is to try to run these cameras for years of time - hopefully capturing interesting details like the landscape in wet years/dry years/hot years/cool years, watching the lights and the landscape change as areas are developed/preserved/destroyed/re-created and eventually allowing us to compare details from 1, 2, 3, 5 or 10+ years ago. Of course many long term projects never make it to old age - but fun to try regardless!!!
Cloudy Day - West. 10/24/2023.Cloudy Day - North. 10/24/2023.Cloudy Day - East. 10/24/2023.Just after Sunset - West. 10/16/2023.Just after Sunset - North. 10/16/2023.Just after Sunset - East. 10/16/2023.Dark Night - North. 10/16/2023.
Created by Charles on 6/6/2023. Updated on 6/18/2023.
Caught. Charles Miles. 5/22/2023.
INotifyPropertyChanged is central to the WPF binding system and as far as I know the interface hasn't changed since WPF's beginnings in .NET Framework 3.0 (2006 or so). It is rather beautiful - spare, simple, easy to implement and it creates quite a bit of value by facilitating WPF bindings.
// Licensed to the .NET Foundation under one or more agreements.
// The .NET Foundation licenses this file to you under the MIT license.

namespace System.ComponentModel
{
    public interface INotifyPropertyChanged
    {
        event PropertyChangedEventHandler? PropertyChanged;
    }
}
For many years I've written code like this:
public class MainViewModel
{
    public string? UserInput { get; set; }
}
And then used Resharper to generate the INPC implementation and expand the properties to use it.
public class MainViewModel : INotifyPropertyChanged
{
    private string? _userInput;

    public string? UserInput
    {
        get => _userInput;
        set
        {
            if (value == _userInput) return;
            _userInput = value;
            OnPropertyChanged();
        }
    }

    public event PropertyChangedEventHandler? PropertyChanged;

    protected virtual void OnPropertyChanged([CallerMemberName] string? propertyName = null)
    {
        PropertyChanged?.Invoke(this, new PropertyChangedEventArgs(propertyName));
    }

}
The boiler plate code for INPC looks out of place against 'modern' C#/.NET with its minimal APIs and top level statements... Over a decade of real world experience suggests the cost of this verbose code is fairly low, but hundreds/thousands/+ lines of code, even stable and simple code, obviously has some cost. For many years I didn't find an alternative to the classic INPC boiler plate/generation where the various trade offs seemed worthwhile - but recently I've been using the source generator approach from The Windows Community Toolkit successfully. The example above reduces down to the code below:
public partial class MainViewModel : ObservableObject
{
    [ObservableProperty] private string? _userInput;
}
ObservableObject (which can either be inherited or added via attribute/source generation) implements INPC and _userInput is transformed into a public property suitable for use with WPF bindings! The Windows Community Toolkit seems well supported and the project continues to evolve - I suspect using The Windows Community toolkit is a good choice for use in long lived applications.
As far as I can tell The Windows Community Toolkit's focus is creating great tools/approaches like [ObservableProperty] - not on helping you build functionality like [ObservableProperty] yourself. This distinction recently became relevant to me because The Windows Community Toolkit offers another great feature for WPF/MVVM/ICommand based approaches with the RelayCommand attribute. Similar to the [ObservableProperty] [RelayCommand] can help reduce boiler plate by generating the code to create a RelayCommand property automatically!
But the [RelayCommand] attribute doesn't work for me in the Pointless Waymarks Project - I have a custom setup for Commands that is central to the project. For several months I have occasionally tried to think of a way to modify my approach to work with [RelayCommand] - the reduction of boiler plate using the [ObservableProperty] creates is addictive... But I've failed to come up with any elegant ideas.
Enter Metalama: A Framework for Clean & Concise Code in C#. For me Metalama is interesting because it provides a toolkit to implement functionality like [ObservableProperty] or [RelayCommand]. Thru examples, documentation and a bit of hacking I was able to build INPC and Command aspects in about a day so that I can write code like this:
[NotifyPropertyChanged]
[GenerateStatusCommands]
public class MainViewModel
{
    public string? UserInput { get; set; }

    public MainViewModel()
    {
        BuildCommands();
    }

    [BlockingCommand]
    public Task ModifyUserInput()
    {
        UserInput += "Modified";
        return Task.CompletedTask;
    }
}
The code below is NOT, ABSOLUTELY NOT, meant as 'good Metalama examples' (or even as 'good code examples' in general!) - but I found it quite encouraging that I was able to create useful code so quickly using Metalama. Some of the code below is specific to the Pointless Waymarks Project but the look and feel of the code might be interesting if you are considering trying Metalama, this was created using Visual Studio and the experience was like editing any other code:
public class NotifyPropertyChangedAttribute : TypeAspect
{
    public override void BuildAspect(IAspectBuilder<INamedType> builder)
    {
        builder.Advice.ImplementInterface(builder.Target, typeof(INotifyPropertyChanged), OverrideStrategy.Ignore);

        foreach (var property in builder.Target.Properties.Where(p =>
                     p is { IsAbstract: false, Writeability: Writeability.All } && !p.Attributes.Any(typeof(DoNotGenerateInpc))))
            builder.Advice.OverrideAccessors(property, null, nameof(OverridePropertySetter));
    }

    [Introduce(WhenExists = OverrideStrategy.Ignore)]
    protected void OnPropertyChanged(string name)
    {
        PropertyChanged?.Invoke(meta.This, new PropertyChangedEventArgs(name));
    }

    [Template]
    private dynamic OverridePropertySetter(dynamic value)
    {
        SetField(ref meta.Target.FieldOrProperty.Value, value);

        return value;
    }

    [InterfaceMember] public event PropertyChangedEventHandler? PropertyChanged;

    [Introduce(WhenExists = OverrideStrategy.Ignore)]
    protected bool SetField<T>(ref T field, T value, [CallerMemberName] string? propertyName = null)
    {
        if (string.IsNullOrWhiteSpace(propertyName)) throw new ArgumentNullException(nameof(propertyName));

        if (EqualityComparer<T>.Default.Equals(field, value)) return false;
        field = value;
        OnPropertyChanged(propertyName);
        return true;
    }
}

public class DoNotGenerateInpc : Attribute
{
}

public class GenerateStatusCommandsAttribute : TypeAspect
{
    public override void BuildAspect(IAspectBuilder<INamedType> builder)
    {
        foreach (var method in builder.Target.Methods.Where(p =>
                     (p.Attributes.Any(typeof(BlockingCommandAttribute)) ||
                      p.Attributes.Any(typeof(NonBlockingCommandAttribute))) && p.Parameters.Count == 0))
            builder.Advice.IntroduceAutomaticProperty(method.DeclaringType, $"{method.Name}Command",
                TypeFactory.GetType(typeof(RelayCommand)).ToNullableType(), IntroductionScope.Default,
                OverrideStrategy.Ignore,
                propertyBuilder => propertyBuilder.Accessibility = Accessibility.Public);

        foreach (var method in builder.Target.Methods.Where(p =>
                     (p.Attributes.Any(typeof(BlockingCommandAttribute)) ||
                      p.Attributes.Any(typeof(NonBlockingCommandAttribute))) && p.Parameters.Count == 1 &&
                     p.Parameters[0].Type.ToType() != typeof(CancellationToken)))
        {
            var firstParameterType = method.Parameters[0].Type;

            builder.Advice.IntroduceAutomaticProperty(method.DeclaringType, $"{method.Name}Command",
                ((INamedType)TypeFactory.GetType(typeof(RelayCommand<>)))
                   .WithTypeArguments(firstParameterType).ToNullableType(),
                IntroductionScope.Default,
                OverrideStrategy.Ignore,
                propertyBuilder =>
                {
                    propertyBuilder.Accessibility = Accessibility.Public;
                    propertyBuilder.InitializerExpression = null;
                });
        }

        foreach (var method in builder.Target.Methods.Where(p =>
                     (p.Attributes.Any(typeof(BlockingCommandAttribute)) ||
                      p.Attributes.Any(typeof(NonBlockingCommandAttribute))) && p.Parameters.Count == 1 &&
                     p.Parameters[0].Type.ToType() == typeof(CancellationToken)))
            builder.Advice.IntroduceAutomaticProperty(method.DeclaringType, $"{method.Name}Command",
                TypeFactory.GetType(typeof(RelayCommand)).ToNullableType(), IntroductionScope.Default, OverrideStrategy.Ignore,
                propertyBuilder => propertyBuilder.Accessibility = Accessibility.Public);

        builder.Advice.IntroduceMethod(builder.Target, "BuildCommands");
    }

    [Template]
    public void BuildCommands()
    {
        foreach (var loopMethods in meta.Target.Type.Methods.Where(p =>
                     p.Attributes.Any(typeof(BlockingCommandAttribute)) && p.Parameters.Count == 0))
            meta.InsertStatement(
                $"{loopMethods.Name}Command = StatusContext.RunBlockingTaskCommand({loopMethods.Name});");

        foreach (var loopMethods in meta.Target.Type.Methods.Where(p =>
                     p.Attributes.Any(typeof(NonBlockingCommandAttribute)) && p.Parameters.Count == 0))
            meta.InsertStatement(
                $"{loopMethods.Name}Command = StatusContext.RunNonBlockingTaskCommand({loopMethods.Name});");

        foreach (var loopMethods in meta.Target.Type.Methods.Where(p =>
                     p.Attributes.Any(typeof(BlockingCommandAttribute)) && p.Parameters.Count == 1))
            if (loopMethods.Parameters[0].Type != TypeFactory.GetType(typeof(CancellationToken)))
                meta.InsertStatement(
                    $"{loopMethods.Name}Command = StatusContext.RunBlockingTaskCommand<{loopMethods.Parameters[0].Type}>({loopMethods.Name});");
            else
                meta.InsertStatement(
                    $"{loopMethods.Name}Command = StatusContext.RunBlockingTaskWithCancellationCommand({loopMethods.Name}, \"Cancel {SplitCamelCase(loopMethods.Name)}\");");

        foreach (var loopMethods in meta.Target.Type.Methods.Where(p =>
                     p.Attributes.Any(typeof(NonBlockingCommandAttribute)) && p.Parameters.Count == 1 &&
                     p.Parameters[0].Type != TypeFactory.GetType(typeof(CancellationToken))))
            if (loopMethods.Parameters[0].Type != TypeFactory.GetType(typeof(CancellationToken)))
                meta.InsertStatement(
                    $"{loopMethods.Name}Command = StatusContext.RunNonBlockingTaskCommand<{loopMethods.Parameters[0].Type}>({loopMethods.Name});");
    }

    private string SplitCamelCase(string str)
    {
        //https://stackoverflow.com/questions/5796383/insert-spaces-between-words-on-a-camel-cased-token
        return Regex.Replace(Regex.Replace(str, @"(\P{Ll})(\P{Ll}\p{Ll})", "$1 $2"), @"(\p{Ll})(\P{Ll})", "$1 $2");
    }
}

public class BlockingCommandAttribute : Attribute
{
}

public class NonBlockingCommandAttribute : Attribute
{
}
Moving to Metalama is a tradeoff - The Windows Community Toolkit source generators offer more functionality than I will ever implement myself in Metalama and there is a cost if you want all of the Metalama features - but so far Metalama has offered good functionality without a major investment and I'm intrigued by the idea that code generation/aspects could be an integrated, easy to create, everyday part of coding a C# project.
Purple Martin. Charles Miles. 6/4/2023.
PS - I had enough code to convert that I quickly got tired of editing everything 'manually' - but not enough (and enough variety) that a full scripted conversion didn't seem worthwhile. My in-between solution was helper LINQPad scripts that when run pull text off the clipboard, do some simple-but-helpful text conversion work and then put it back on the clipboard. This did speed me up - maybe it could help you with something so left here because ... why not!
//LinqPad snippet: Takes the text on the clipboard, does text replacement to convert
//[ObservableProperty] declarations to Public Property declarations and puts the
//converted text on the clipboard:
//  [ObservableProperty] private int _userInitialValue = 1;
//becomes:
//  public int UserInitialValue { get; set; } = 1;
//
//Written to help convert blocks of MVVM Toolkit [ObservableProperty] declarations into
//public property declarations.

var source = Clipboard.GetText();

var lines = source.Split(";");

var results = new List<string>();

foreach (var loopLine in lines)
{
 if (string.IsNullOrWhiteSpace(loopLine) || loopLine.Contains("RelayCommand")) continue;

 var modifiedLine = string.Empty;
 modifiedLine = loopLine.Replace("[ObservableProperty] private ", "public ");
 if (modifiedLine.Contains("="))
 {
  modifiedLine = $"{modifiedLine.Replace("=", "{get; set;} =")};";
 }
 else
 {
  modifiedLine = $"{modifiedLine} {{ get; set;}}";
 }

 var underscorePosition = modifiedLine.IndexOf(" _");

 if (underscorePosition >= 0)
 {
  var underscoreAndLowercase = modifiedLine.Substring(underscorePosition + 1, 2);
  var underscoreAndUppercase = underscoreAndLowercase.Substring(1, 1).ToUpper();
  modifiedLine = modifiedLine.Replace(underscoreAndLowercase, underscoreAndUppercase);
 }

 results.Add(modifiedLine);
}

//Show the conversion in the output window and put it on the clipboard
String.Join(string.Empty, results).Dump();
Clipboard.SetText(String.Join(string.Empty, results));
//LinqPad Snippet: Takes the text on the clipboard, thru text replacement changes private
//field initialization to public property initializations and puts the coverted clip onto
//the clipboard for pasting - no code introspection, just text processing:
//  _userInitialValue = referenceObject.Something;
//to:
//  UserInitialValue = referenceObject.Something;
//
//Written as a little help for moving away from the MVVM Toolkits [ObservableProperty]
//where you may end up with quite a bit of private field initialization - esp. in constructors
//and in Nullable enabled scenarios - that you now want to be public property initialization.

var source = Clipboard.GetText();

var currentUnderscorePosition = source.IndexOf(" _");

while(currentUnderscorePosition >= 0){
 var underscoreAndLowercase = source.Substring(currentUnderscorePosition + 1, 2);
 var underscoreAndUppercase = underscoreAndLowercase.Substring(1, 1).ToUpper();
 source = source.Replace(underscoreAndLowercase, underscoreAndUppercase);
 currentUnderscorePosition = source.IndexOf(" _");
}

//Show the conversion in the output window and put it on the clipboard
source.Dump();
Clipboard.SetText(source);
Sunset over Green Mountain from Guthrie Mountain. Charles Miles. 5/9/2019.
Back in time, deep in the 2000s internet, you would have found my Flickr photographs consistently licensed with a Creative Commons license. I'm not sure what I would have said at the time about the license - but looking back I think it was mainly a signal, a way to be part of a community creating content online and looking with suspicion on older models of intellectual property.
Every now and then someone would use - or contact me about using a photo. But with only an occasional request, and no intention to make photography my job, licensing choices faded into the background - my licensing brain cells moved on to software licenses I guess...
Green Mountain and Guthrie Mountain from Barnum Rock. Charles Miles. 5/18/2016.
Recently I have been thinking about photo licensing again:
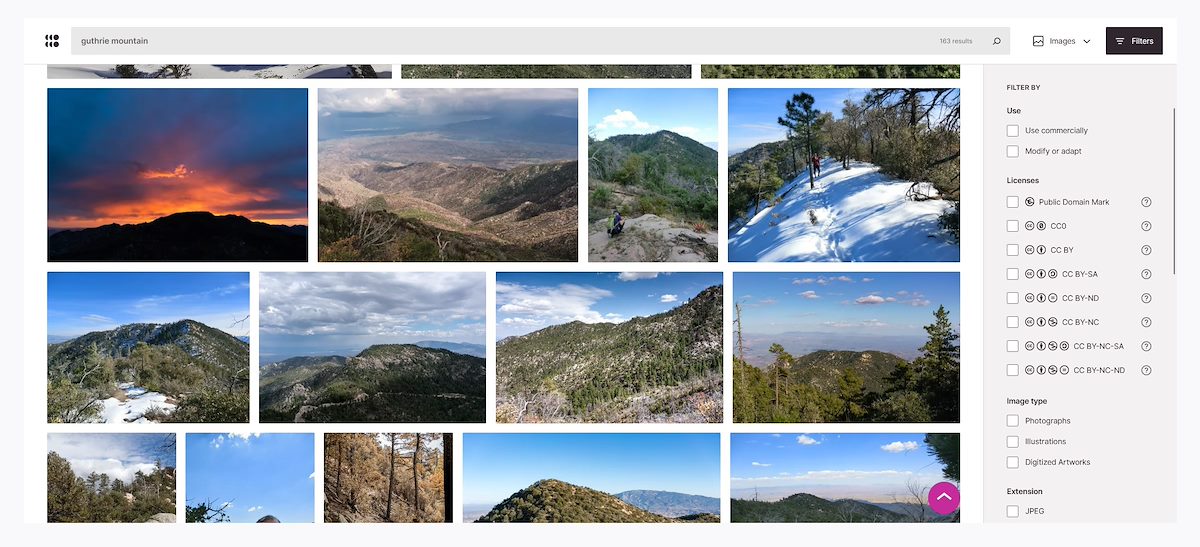
Openverse Search Results for Guthrie Mountains - March 2023.
In the screenshot above you can see some of my photographs on Openverse - "a tool that allows openly licensed and public domain works to be discovered and used by everyone." I applaud the idea behind Openverse - educational material, historic places, important events... photographs of all sorts that can be searched and used liberally (especially in free projects) - hugely important. (Perhaps see and consider Wikimedia Commons for a variation of this idea with a hard to ignore impact).
Openverse searches across more than 300 million images from open APIs and the Common Crawl dataset. It goes beyond simple search to aggregate results across multiple public repositories into a single catalog, and facilitates reuse through features like machine-generated tags and one-click attribution.
It seems that a very important part of CC licenses has become signaling to machines that they can use content without any meaningful query to, conversation with or participation by its creator.
Guthrie Mountain. Charles Miles. 12/22/2012.
Openverse presents quite a lot of information of about a photograph - but no nuance. No creator profiles, no effective search for a specific creator, no stories, no context on what it would be appropriate for, nothing about why, wishes, hopes or dreams - no context... I don't doubt that this targets the needs of the average Openverse customer who wants to quickly get an image of ________ - but dehumanized mega-search isn't where my small records of place and time belong. My concerns about the usage of my photographs go well beyond what I can express with a CC license. The Creative Commons alludes to this general idea in their 2021-2025 Strategy Document:
Today, changed technological, social, cultural, political, legal and economic environments raise new challenges for the open movement. In order to protect what we have achieved so far and to create the world we want to see, we must expand our focus beyond copyright licensing, because content sharing cannot be decoupled from economic or ethical concerns. Indeed, the benefits of open sharing can be undermined by exploitative practices that threaten the financial sustainability of open endeavors, leading to economic hardship. Further, open sharing practices can also be marred by ethical concerns, such as the problematic use of open content to train potentially harmful artificial intelligence (Al) technologies or the use of open content in violation of non-copyright norms.
These days if you visit my photographs on Flickr you will see them listed as 'all rights reserved'. A relic from the old world I guess, but I don't think there is a license, metadata field or legal framework that would adequately define how I feel about these photographs or what I believe it would be appropriate to use them for. 'All rights reserved' seems to be the best stand in for 'let's talk like humans about it'... If you are interested in having a conversation about using my photographs contact me, regardless of my answer I bet you have an interesting story that I'd love to hear...
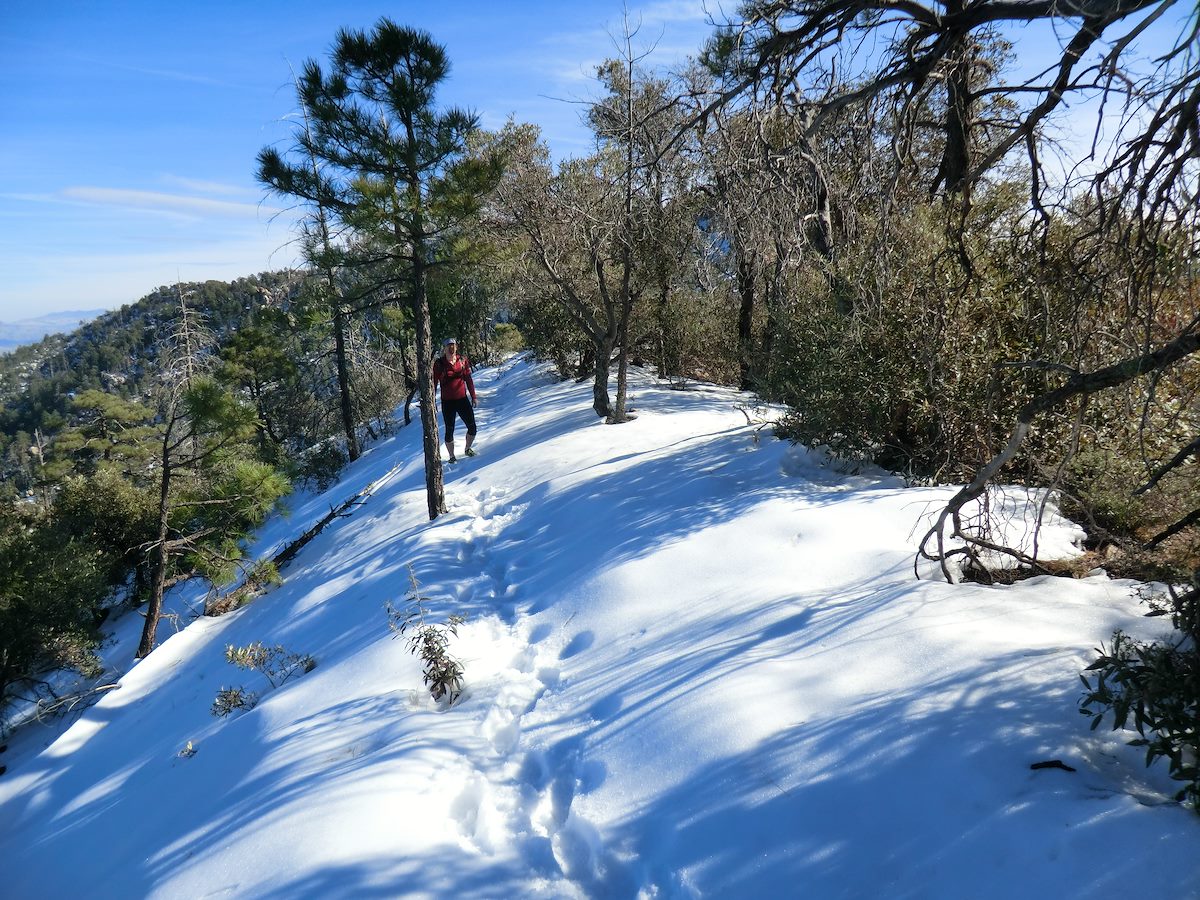
Snow on the Guthrie Mountain Trail. Charles Miles. 12/22/2012.
Created by Charles on 1/29/2023. Updated on 2/19/2023.
A little slice of life from 2022/2023 - my personal browsing setup frozen in time - maybe something of interest now but probably mostly something to look back on with amusement in the post-internet future when the AIs deliver all this straight into your brain...
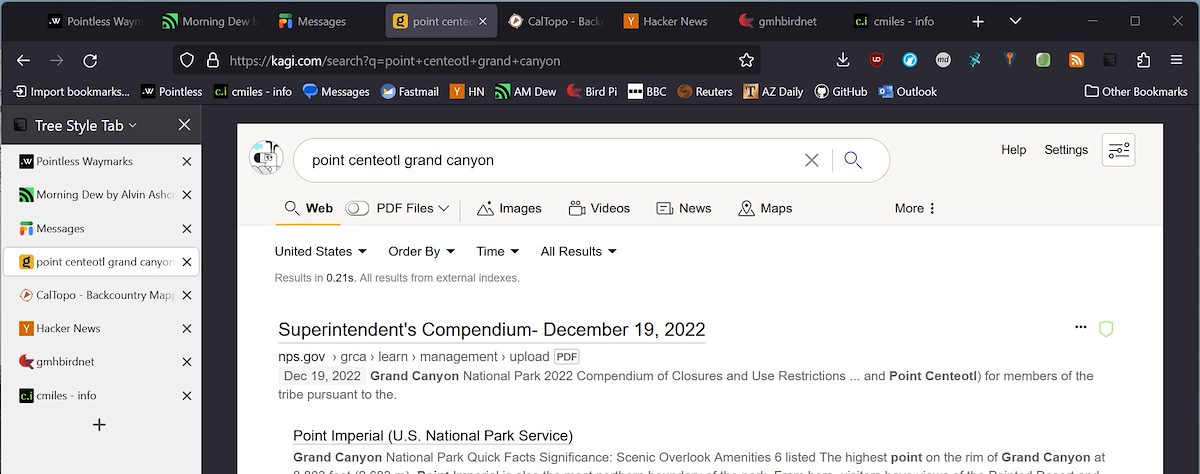
$10 a month to use a search engine - when google search is free - and yet another subscription - seems like too much? But two months in and I'm hooked! I've tried to switch away from google search several times in the past few years and always switched back because the search results never seemed as good. So far with Kagi the results seem as good, or maybe even slightly better than google - and with NO ADS! It is a surprising relief not having the top third (?half) of every search result filled with paid spam... The Website Ranking Adjustment has also proved to be quite useful -> each search result has a small icon next to it where you can quickly apply a ranking adjustment for the site - this has allowed me to quickly eliminate a number of no-value-to-me sites and make it more likely that other sites appear at the top. For now I'm very happy giving Kagi my $10 a month.
Years ago my browser choices were driven by compatibility and tooling - eventually Chrome was all I used. In recent years most of the browsers I have tried work without many issues and it has been fun trying a few different browsers for daily use. So far my favorite is LibreWolf:
This project is a custom and independent version of Firefox, with the primary goals of privacy, security and user freedom.
LibreWolf is designed to increase protection against tracking and fingerprinting techniques, while also including a few security improvements. This is achieved through our privacy and security oriented settings and patches. LibreWolf also aims to remove all the telemetry, data collection and annoyances, as well as disabling anti-freedom features like DRM.
A screen shot of Librewolf and Kagi Search.
So far the problems I've had have been covered by the LibreWolf FAQ, if you try LibreWolf I recommend having it open as you get started...
Some settings changes/exceptions that I made are listed below - these aren't 'recommended', just some perspective on what I found that balanced security, privacy and everyday use:
Enable WebGL - Disabled by default with the note "WebGL is a strong fingerprinting vector. If you need to enable it, consider using an extension like Canvas Blocker." I found a number of sites I use need WebGL so I enabled it and installed CanvasBlocker.
Add an Exception to HTTPS Only Mode for our BirdNET-Pi site since it is setup as local and http only.
Enable letterboxing - This anti-fingerprinting measure works by only allowing your screen to adjust to certain sizes, rather than a unique size that might help identify you. I thought the extra space/border around everything would be distracting, but I turned this on, it didn't bother me and now I always have it on.
Make exceptions as needed for Canvas Access - To the left of a site's URL in the address bar an icon will appear if canvas access has been silently blocked. On many sites LibreWolf's default behavior of silently blocking canvas requests works great - but on other sites it results in items like icons appearing as strange striped blocks...
The list of extensions below is largely similar to a list I would make for any browser - but just-in-case it is interesting, there are a few LibreWolf specific details:
LibreWolf Updater Extension - LibreWolf for windows doesn't update automatically, this extension checks for and notifies you of updates (it does not install them). With a little setup LibreWolf-WinUpdater can provide automatics updates.
There are quite a few password managers available and I've only tried a handful - but so far the one that is the best fit for what I want is KeePass. KeePass runs on your local machine and stores passwords in an encrypted database file. Services like Dropbox can sync your database file across devices, Android apps are available and desktop browser support is provided by Kee. No centralized service to trust, no subscription fees and an offline first experience while still getting good-enough-for-me browser and mobile device support!
(Worth mentioning that KeePassXC is also an excellent choice - it works essentially the same way and can use the same encrypted database files. I currently use KeePass in part because the KPSimpleBackup Plugin is a notable benefit to my personal workflow, but largely the programs are interchangeable - great to have multiple programs that support the same file format!)
I run KeePass with two plugins:
KPSimpleBackup - Backup Plugin for KeePass2 - with KeePass it is completely up to you to keep your password database backed up. You should have a backup strategy that covers all of your important personal digital information, but given the extraordinary value of passwords I use KPSimpleBackup to also provide additional backups on multiple machines.
KeePassRPC - provides communication between KeePass and a browser plugin like Kee - worth the extra time to setup.
The Sun Near Home. Charles Miles. 2/6/2023.
It was fun to write this down - it is an amusing game these days trying to guess what tech will survive 1, 5, 10, 20+ years into the future - and maybe an even tougher game trying to guess what tech will remain personally relevant. Even during the short time I was writing this there was an explosion of interest in a Microsoft announcement of AI-powered Bing Search - I suspect it is mostly hype for my personal use, but I've already had some fun at work trying ChatGPT for product descriptions (interesting) and trail descriptions (disappointing) so who knows...
For many years the COM Interop approach facilitated by the code above was the main technique I used for generating Excel files - but by the mid-2010s it was clear to me that using libraries like ClosedXML, which don't require the Excel application to be installed, are a better approach.
At work the task of moving many years of Excel COM Interop based reporting to ClosedXML is an ongoing, long-term, low-priority task.
At the end of 2022 I tackled converting a heavily used report where the final step of the report creation is splitting and positioning the user's initial view. (Note here that 'splitting' is not the same as 'freezing'...)
I couldn't find a way to do this in ClosedXML... So I decided that after writing the file to disk with ClosedXML I would use OpenXML to setup the split. A simple enough approach (that eventually worked), but working directly thru OpenXML is not my usual code path and the first few failures made it clear that I was going to need some reference material on what properties to set with what values.
I used the one trick I remembered for these files to help me look at the underlying XML - I renamed the file with a .zip extension and then navigated into it. This works and it is a good trick because it doesn't require any additional programs/tooling - if I had managed to immediately intuit the correct code changes I wouldn't have given this hack a second thought... But I didn't get the code right in the first few tries and as I tested code changes I very quickly wanted a better way to take a direct look at the files' XML.
After a little searching I found the Borislav Ivanov's Open XML Package Editor Power Tool for Visual Studio. Once installed in Visual Studio you can drop an Open XML/Excel file into Visual Studio and start exploring. This was fantastic and let me find the last detail I needed...
The code below has so far stood up to some light testing - presented as research and reading material more than code you should copy and paste...
/// <summary>
///     Splits the first sheet in an OpenXML Excel File into 2 vertical panes.
///     If the file, workbook or worksheet don't exist the method will exit
///     without throwing an exception.
/// </summary>
/// <param name="filename">Full Path and Filename of the OpenXML Excel Files</param>
/// <param name="verticalSplitHeight">Value in 1/20th of a point</param>
/// <param name="topLeftCellAddressForUpperPane">
///     In A1 style - upper left corner of the top pane, left column for both
///     panes
/// </param>
/// <param name="topRowForLowerPane">Top row for the lower pane</param>
/// <returns>The Filename</returns>
public static string ExcelFileFirstSheetTwoSplitVerticalPanes(this string filename, double verticalSplitHeight,
    string topLeftCellAddressForUpperPane, int topRowForLowerPane)
{
    //1/1/2023 - As far as I can tell ClosedXML doesn't offer options to create a Vertical
    //Split (not Freeze) with the TopLeft Cell set for both panes.
    //
    //Let me know if this is incorrect and this functionality is available - it would be
    //better not to re-open and re-save the file...But all things considered getting the
    //correct view setup for a user can be an important enough
    //feature to merit this approach.

    if (!File.Exists(filename)) return filename;

    using var xl = SpreadsheetDocument.Open(filename, true);

    var workbook = xl.WorkbookPart;
    var worksheet = workbook?.WorksheetParts.FirstOrDefault();
    if (worksheet?.Worksheet.SheetViews?.FirstOrDefault() is not SheetView view) return filename;

    //Clear the view for the new Pane and Selections created below
    view.RemoveAllChildren();

    //This will set the upper pane's top left cell
    view.TopLeftCell = topLeftCellAddressForUpperPane;

    //Setup the split - note that VerticalSplit is the number of rows when Freezing
    //but is "Vertical position of the split, in 1/20th of a point" when splitting.
    //   https://learn.microsoft.com/en-us/dotnet/api/documentformat.openxml.spreadsheet.pane?view=openxml-2.8.1
    var newPane = new Pane
    {
        VerticalSplit = verticalSplitHeight,
        TopLeftCell = $"A{topRowForLowerPane}",
        ActivePane = PaneValues.BottomLeft,
        State = PaneStateValues.Split
    };

    //Set a reasonable Selection
    var lowerPaneTopLeftCellAddress =
        $"{string.Concat(topLeftCellAddressForUpperPane.Where(x => !char.IsDigit(x)))}{topRowForLowerPane}";

    var selectionSor = new ListValue<StringValue>();
    selectionSor.Items.Add(lowerPaneTopLeftCellAddress);

    var selection = new Selection
    {
        SequenceOfReferences = selectionSor,
        ActiveCell = lowerPaneTopLeftCellAddress,
        Pane = PaneValues.BottomLeft
    };

    //Add the Pane and Selection - save the file.
    view.Append(newPane);
    view.Append(selection);
    worksheet.Worksheet.Save();
    workbook.Workbook.Save();
    xl.Close();

    return filename;
}
A Rainbow for the New Year. Charles Miles. 1/1/2023.
Created by Charles on 12/20/2022. Updated on 12/27/2022.
Fall Color in Ash Creek 01. Charles Miles. 11/7/2022.
2022... This year started with a week long septic install and ends with COVID - questionable bookends but there were lots of great times and great people in-between. Notes from the end of the year.
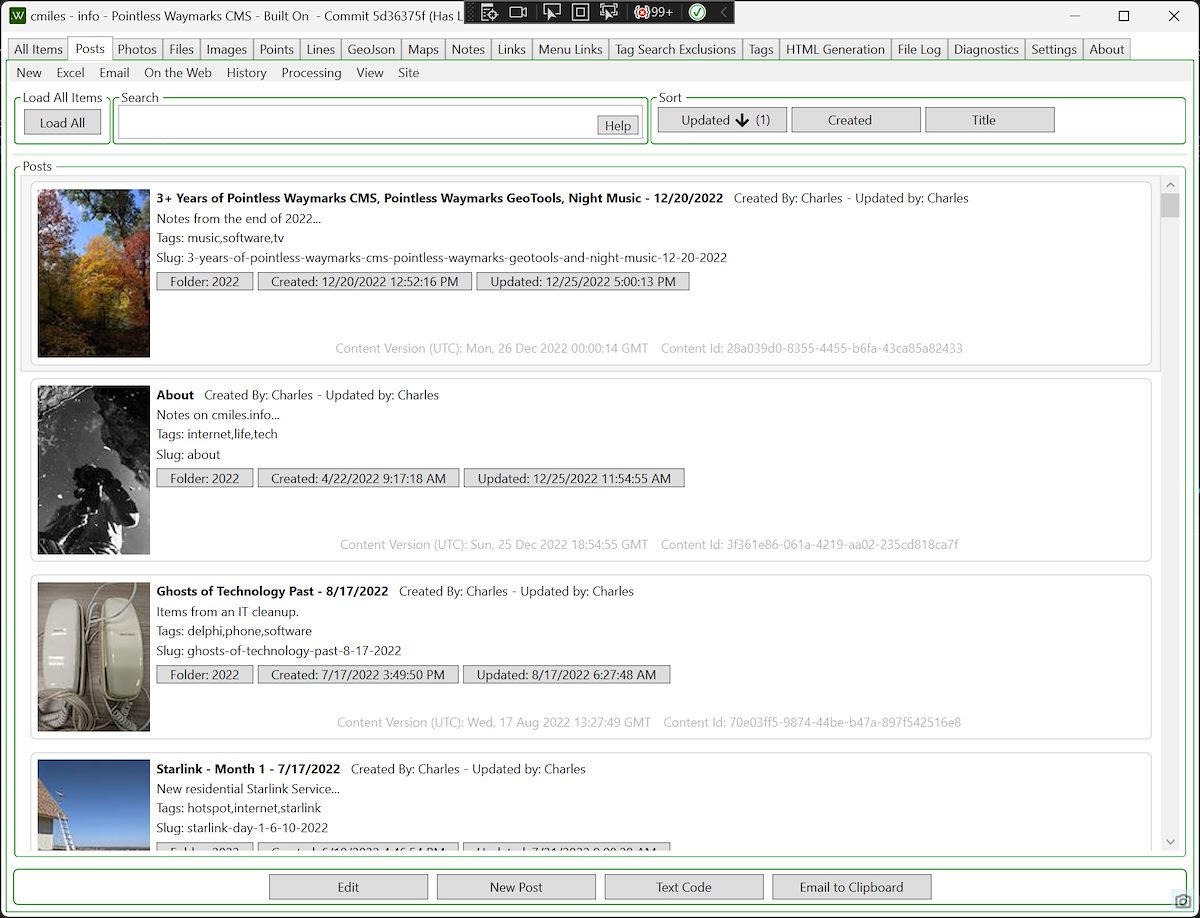
The Main GUI Interface for the Pointless Waymarks CMS.
I've been working on the Pointless Waymarks CMS for over 3 years! I currently use it to create and maintain this site, Pointless Waymarks and 2 private sites. This is by far the largest and longest-lived personal software project I have worked on and I am excited to continue development in 2023! The targets/goals/setup of the project still seem like good choices to me:
Desktop Software: This continues to be a good choice for zero cost personal projects that are fully functional offline - three years in and all things considered I'm glad Pointless Waymarks is a WPF Windows Desktop Application.
Static Sites with Simple Presentations: The sites that I am creating and maintaining with the Pointless Waymarks software are purely personal - no growth goals or investors, no need to be on-trend. I continue to suspect that static sites with simple presentations are a great bet for long term durability with minimal maintenance.
Offline Viewing: with a custom way to organize and present content why limit the output to online presentation - the project includes a simple offline viewer.
Custom Software: There are a practically infinite number of programs, sites and frameworks that you can use to create websites - but I remain very happy with the decision to write custom software. It can be surprisingly nice to use software that is actually 'for you'.
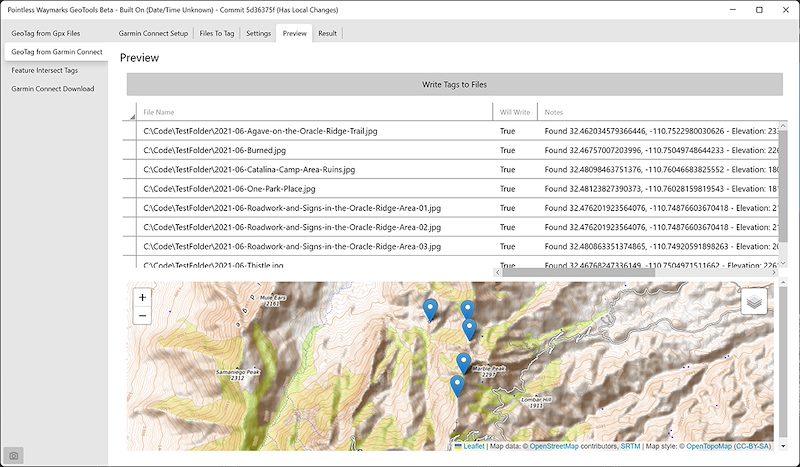
Late this year I added a GeoTools GUI to the Pointless Waymarks Project. This program is centered around geotagging photographs and adding tags automatically based on locations.
My interest in geotagging photographs has waxed and waned over the years. Part of the reason that my interest dwindled is because I believe that it is rarely appropriate to make public the exact location of a landscape photograph. But more recently I have been convinced that having the GPS location of a photograph for personal use is well worth the cost of having to carefully manage what metadata is exported when publishing an image.
Colliding with my renewed interest in geotagging is my long term use of Garmin Connect. In addition to geotagging from local .gpx files the GeoTools program can use an Unofficial Garmin Connect Client to geotag photographs.
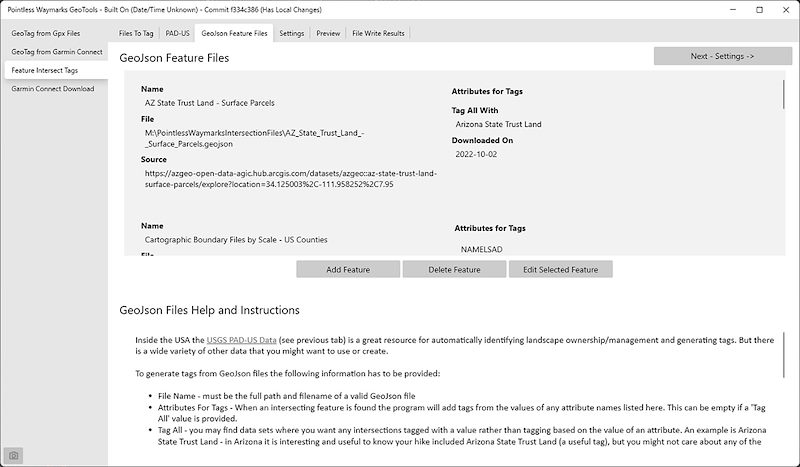
A screenshot from the Pointless Waymarks GeoTools showing the setup screen for GeoJson files that will be used as a reference in Feature Intersect Tagging.
I have added tags (keywords) to at least 8,000 photographs by hand over the last two decades. Especially in the last decade I have tried to include location information including land ownership and management agency, for example: 'Santa Catalina Mountains', 'San Pedro River Valley', 'Coronado National Forest', 'Zion National Park'. For the most part I have remembered to apply these tags and have applied them correctly - but just like all 'by hand' data entry no matter how much you know, care and try there will always be mistakes...
After working with more geospatial data this year it occurred to me that tagging locations - if the photograph is geotagged - is really better done by a computer! I'm based in the Southwestern United States and there is quite a bit of publicly available data about Public Lands - a great example of the available information is the Protected Areas Database (PAD-US) from the U.S. Geological Survey.
How it works:
You setup reference GeoJson files for the program to use - including telling it which properties you want to become tags
You select the photographs to tag
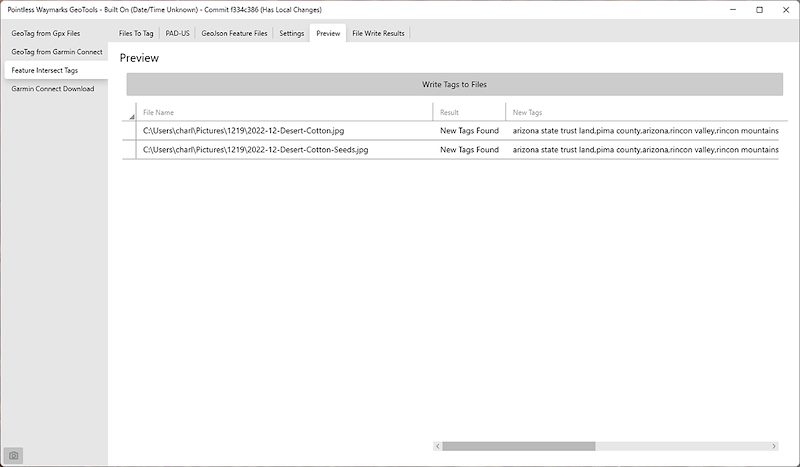
The program scans the GeoJson files for features that intersect the photograph's location and creates tags from the intersections
The Pointless Waymarks GeoTools Feature Intersect Tagging works offline and it is easy to create your own reference files (perhaps for unofficial areas/names - geojson.io is a good starting point. Because the program scans thru the local GeoJson files on each run it can be relatively slow - but for now it seems 'good enough' considering the amount, quality and value of the tags that it produces.
If you are a C# programmer it is worth knowing that this functionality is fairly simple to code if you leverage the NetTopologySuite.IO.GeoJSON and NetTopologySuite packages.
A screenshot of the Pointless Waymarks GeoTools showing new tags generated from Feature Intersect Tagging.
When I was in High School in the 1990s I saw Night Music on TV - I remember several episodes but the episode that stick in my memory the most over the years is Night Music #210. This episode manages , in 40-some minutes, to show Diamanda Galas, Indigo Girls, Daniel Lanois, Aretha Franklin, Sonic Youth and Evan Lurie & His Tango Band in both individual performances and collaborations! Rewatching random episodes of Night Music in 2022 it strikes me as the most interesting, diverse and authentic media I have ever seen - it is almost beyond belief that this made it onto commercial over-the-air TV - what a marvel...